Transit Actions
What are Actions?
Transit Actions are tasks that can be initiated automatically as a Train,
running in automatic mode, traverses the layout following a Transit. One or more
Actions may be requested for each Section in a Transit. If a Section is in
a Transit multiple times, different Actions may be specified for each
occurrence of the Section.
Actions only apply to trains run automatically under Dispatcher by a virtual engineer. If
running Trains in automatic mode is of interest, please read on. If your trains will only be
run manually with a human engineer, Actions aren't used.
Actions are set in addition to the standard actions that happen
automatically when a Train runs in automatic mode. Standard actions are things like following
signals and using stop sensors that are specified with each Section. Standard
actions occur automatically whenever a Section is traversed in automatic mode. Other
standard actions include automatically requesting allocation of Sections, and
automatically changing locomotive speed according to signal restrictions.
Special Actions are tied to Sections, but are specified at the Transit
level to provide maximum user flexibility. A Section is a piece of physical track that may,
for example, be used by passenger trains, through freight trains, or locals. Each of these
uses may need different Actions in a specific Section. For example, a
passenger train may make a station stop in a particular Section, whereas a through freight
train may go straight through. Adding special Actions to Transits allows
Active Trains traveling the same path through the layout to have different
Actions.
Special Actions that have not been executed when the section is deallocated are cancelled.
This is to prevent actions being fired randomly when a condition is met hours later.
Requesting an Action
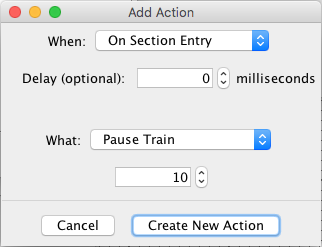
An Action is requested by specifying when an action is to be
performed and what action to be performed. Any
When event may be combined with any What
action. This flexibility provides for a wide variety of Special Actions. An Action is
initiated when the Train enters the Section with the Action request. To decide when
to perform the Action after the Section is entered, the program looks at the
When event.
When to take action?
Available When event
choices are:
- On Section Entry
- On Section Exit - This does not support a delay.
- On Block Entry
- On Block Exit
- On Train Stop
- On Train Start
- On Sensor ACTIVE
- On Sensor INACTIVE
- Delay Start - The delay is the time between the time the engine
is commanded to start and when it will start. Delay Start Action are
executed during this period.
- Delay Start Action - The delay is measured from when Delay Start
is executed.
Optionally a Delay may be set for each When
event, specified in real seconds or milliseconds. If the Delay time is set to zero (the default), the action
will be performed immediately after the When event occurs.
What action to perform?
Available What actions are:
- Pause Train - Stop the Train for a specified number of fast clock
minutes. This item may be used to request a station stop. Set the duration in fast clock
minutes using the spinner.
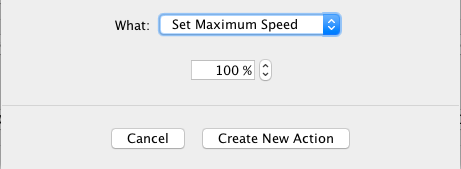
- Set Maximum Speed - Set the maximum speed to a specified percentage of
the maximum hardware speed.
When a Train is run in automatic mode, the program will never exceed this maximum speed.
For example, this item may be used to force an automatic train to run slower through a
town. Setting maximum speed does not affect the current speed of the Train if it is less
than the specified maximum speed (percentage).
- Set Train Speed - Set the current train speed to the target
percentage. The throttle will send the new speed to the locomotive after the delay set
under When.
How long it takes the Train to reach the new speed after that depends upon the locomotive
decoder. The new speed may be either lower or higher than the previous value, but will not
be allowed to exceed the maximum speed.
- Ramp Train Speed - Set the current train speed to the target
percentage by ramping to the target value using the default ramp rate of the automatically
running Train. If the default ramp rate of the Train is RAMP_NONE, this action is
equivalent to Set Train Speed. The new speed may be either lower or higher
than the previous value, but will not be allowed to exceed the maximum speed.
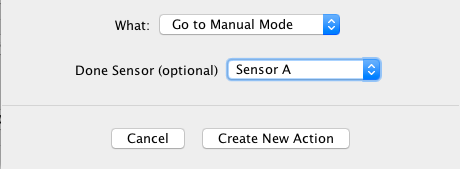
- Go to Manual Mode - Drop out of automatic mode to allow a human
engineer to perform work with a manual throttle. This action supports the scenario where a
Train might be run automatically to a work site, where a human operator takes over to
perform work, after which automatic running is continued. The Train will remain in manual
mode until directed by the dispatcher to resume automatic operation. An optional
Done Sensor allows an operator remote from the dispatcher to notify the
dispatcher that work has been completed and automatic running can be resumed. When the
Done Sensor goes active, the status of the Train is changed from WORKING
to READY. For more information on this action, see Dispatcher. Note: When the
Train is in manual mode, the computer does not have a throttle for the train available, so
delayed actions that happen then and require a throttle are ignored.
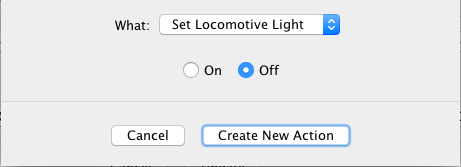
- Set Locomotive Light - Sets the locomotive light either On or
Off as selected.
- Start Bell - Start bell ringing on a sound decoder. This item will
turn throttle function 1 on.
- Stop Bell - Stop bell ringing on a sound decoder. This item will turn
throttle function 1 off.
- Sound Horn - Sound the horn (whistle) of a sound decoder for a
specified time. This item is equivalent to holding down throttle function 2 for the
specified time.
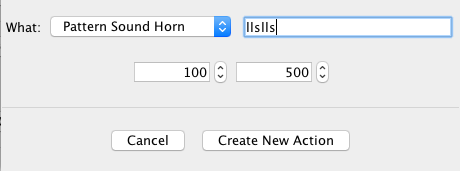
- Pattern Sound Horn - Sound the horn (whistle) in a manner specified by
a user-entered pattern. The pattern consists of short and long blasts, specified as "s" and
"l" in the pattern. For example, a pattern of "lsl" specifies long-short-long. Sets the
duration of the short and long blasts using the two spinners (milliseconds). The short
blast duration is also used as the wait time between blasts. Actual times realized will
depend on the sound decoder and how busy the computer is. The horn/whistle is assumed to be
throttle function 2.
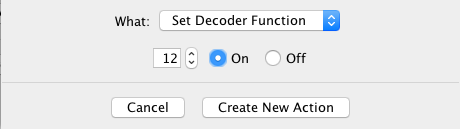
- Set Decoder Function - Sets the specified decoder function either
On or Off as selected. This works for both sound decoders and decoders
without sound.
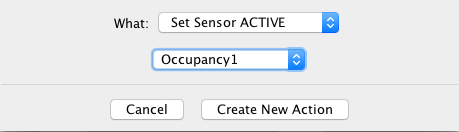
- Set Sensor ACTIVE - Set a specified Sensor active. Select a Sensor
from the drop down (Sensor Table). If the specified Sensor is already in the Active state,
it is first toggled to the Inactive state, then set Active. This action may be used, for
example, with an internal Sensor to trigger a Logix, set a Route, or set a Light. It offers
access to a wide variety of actions not included here, such as running scripts or playing
sounds.
- Set Sensor INACTIVE - Set a specified Sensor inactive. Select a Sensor
from the drop down (Sensor Table). If the specified Sensor is already in the inactive
state, it is first toggled to the active state, then set inactive. This is equivalent to
the action above, except with a different target Sensor state.
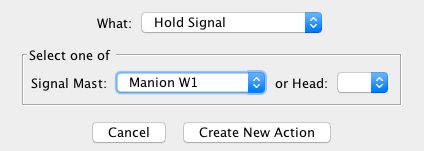
- Hold Signal - Set a specified Signal Mast or Signal Head to HELD.
Select either a Signal Mast or Head from one of the drop downs.
- Release Signal - Set a specified Signal Mast or Signal Head to NOT
HELD. Select either a Signal Mast or Head from one of the drop downs.
- E Stop - Use E-stop to stop the train.
- Terminate Train - Terminates the current train. By delaying the terminate, actions can be
run between the train stopping and being terminated. Do not specify terminate train in the traininfo file.
- Load TrainInfo - Load and run a TrainInfo file. This can be any valid traininfo file and
the locomotive to use can be: Default (the locomotive specified in the file); Current (the locomotive running his train);
Roster (A Roster Entry) or Address (A numeric locomotive address).
If running a Traininfo which uses the current locomotive or starting in the this section, the action must
be executed less than 2 seconds before a terminate.
The View Actions Window
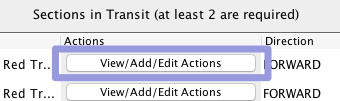
The View Actions window is displayed for a specific Section in a Transit by pressing the
View/Add/Edit Actions button in that Section's row in the Sections
in Transit table on the Add Transit or Edit
Transit pane:
The View Actions window (illustrated below) displays Actions that are
currently set, and provides for adding, editing, or deleting Actions.
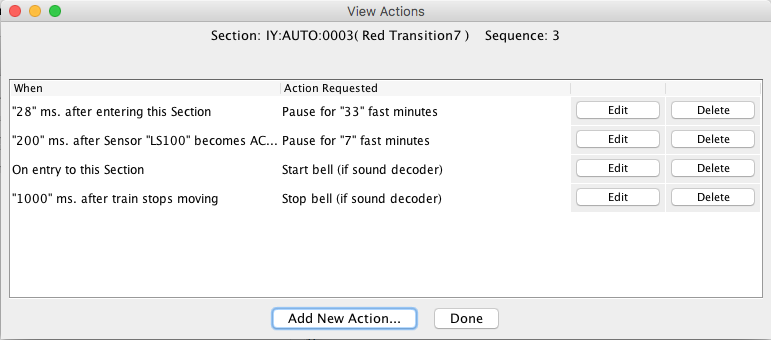
For all Actions that have been created, the When event and the
What action are described in the When and
Action Requested columns respectively.
To add a new Action, click Add New Action... to bring up the
Add/Edit Action window.
To edit an existing Action, click the Edit
button in its row. To delete an existing Action, click the Delete button in
its row. The order of the Actions is not important.
When the Actions are completely defined, click the Done button.
Back to the Transit Add/Edit help page.